How to configure your Ubiquiti UniFi installation with HeyGuest
How to configure your Ubiquiti UniFi installation with HeyGuest
Requirements:
In order for our system to function correctly we require you to have either a a hosted UniFi Controller with a public IP address or a controller on unifi.ui.com. Your server must remain on 24/7; we recommend using cloud hosting opposed to a locally hosted server.
This implementation guide has been written using the Unifi Controller version 8.4.59.
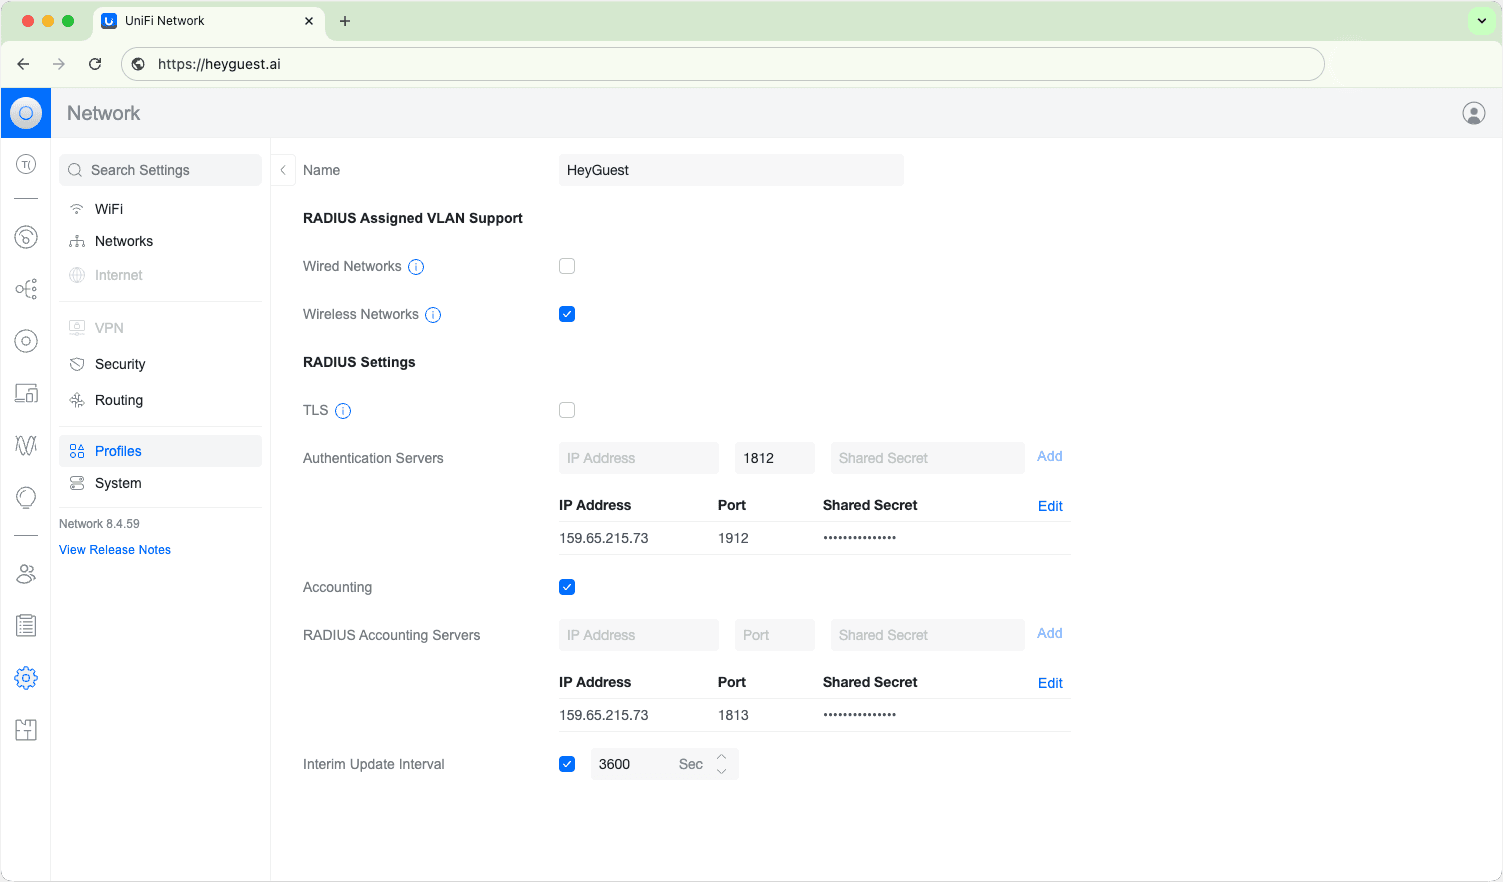
Step 1 – Adding a Radius Profile
When logged into your controller, ensure you have selected the relevant site to this installation.
Click on Settings, Profiles then choose ‘RADIUS’ – the third tab along.
Click ‘Create New’.
In the Name field, enter HeyGuest
RADIUS Assigned VLAN Support:
Tick only the Wireless Networks checkbox
RADIUS Settings:
TLS – Leave unticked
Authentication Servers:
IP Address: 159.65.215.73
Port: 1912 (Ensure to edit this from the default 1812)
Shared Secret: Enter the secret that’s present in your dashboard
Accounting: Tick this box
RADIUS Accounting Servers:
IP Address: 159.65.215.73
Port: 1813
Shared Secret: Enter the secret that’s present in your dashboard
Interim Update Interval: Tick this and enter 3600
Save this profile.
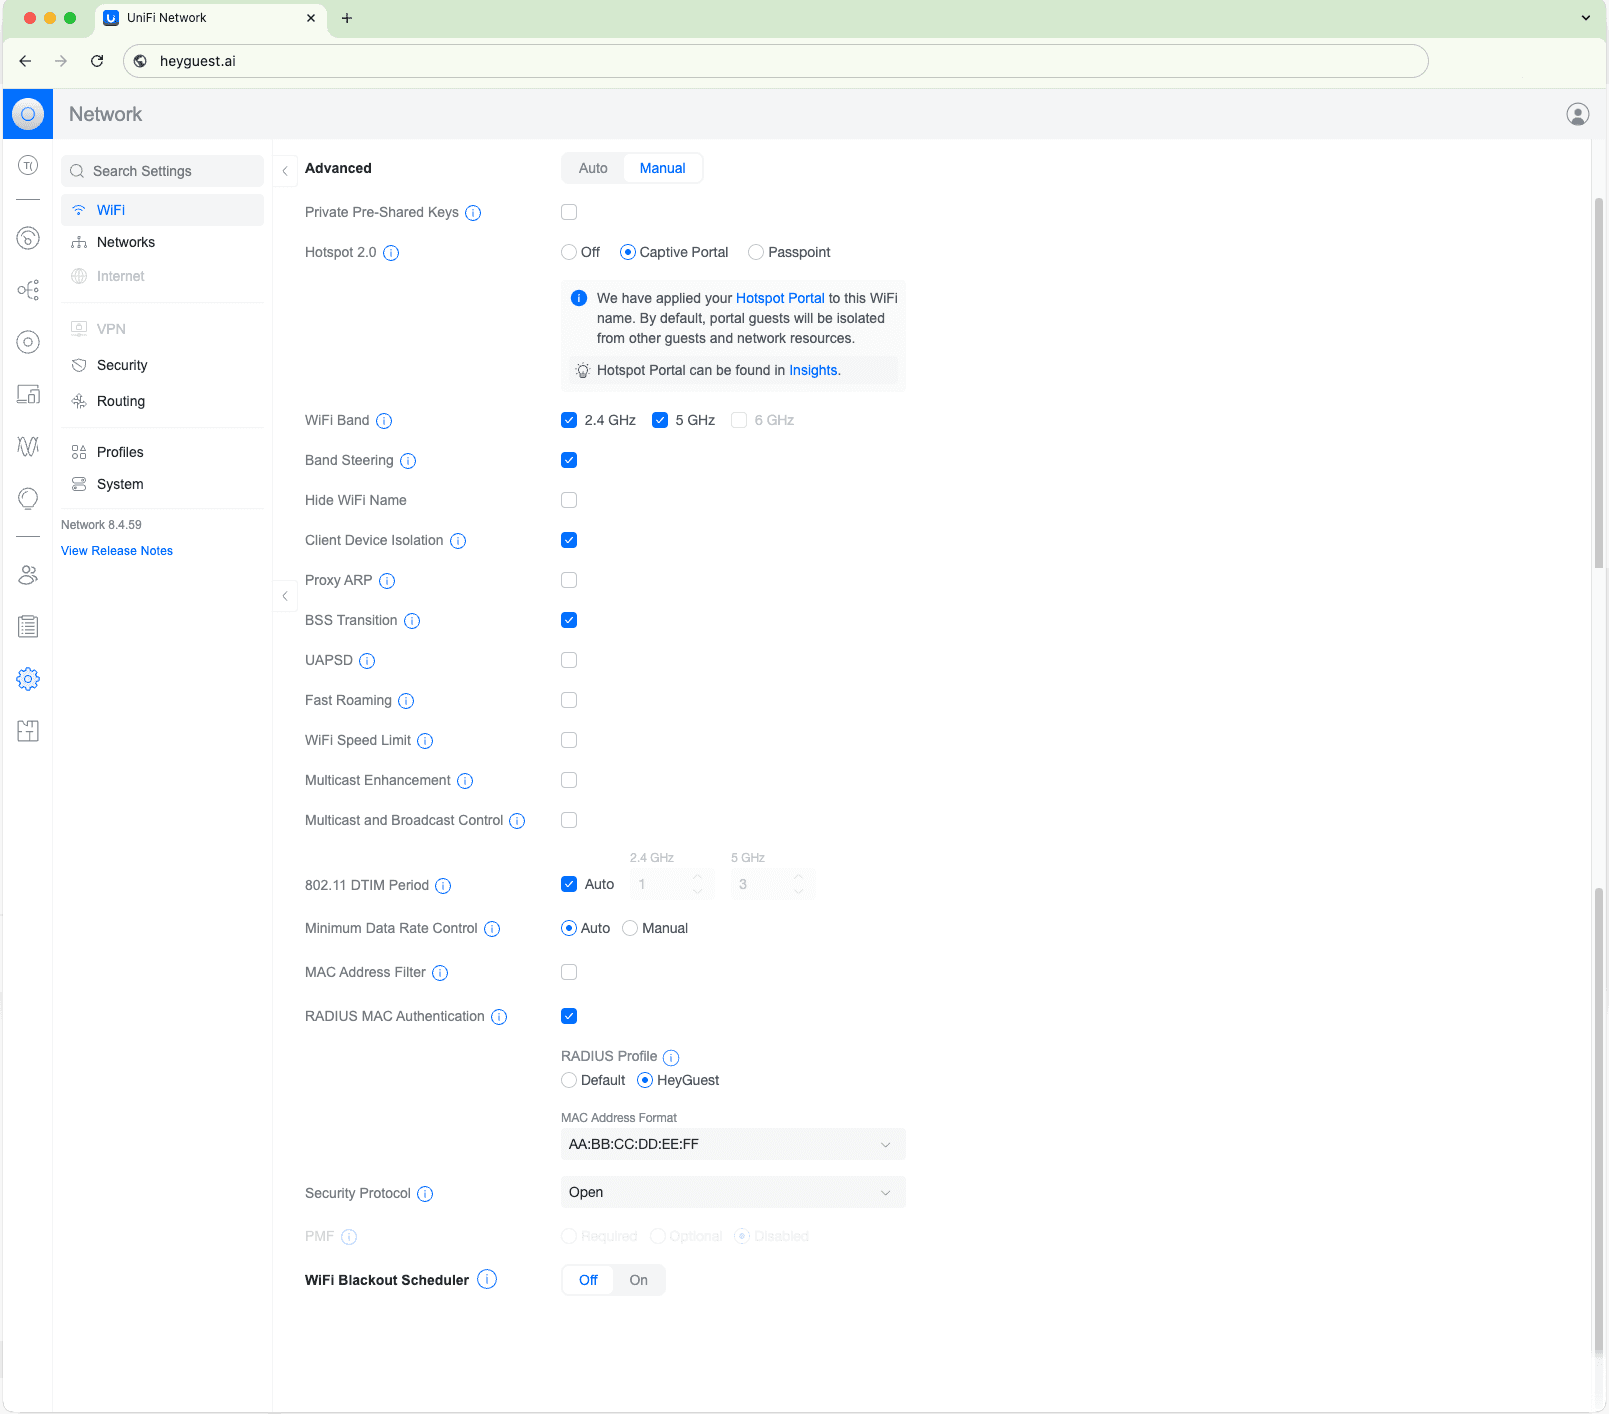
Step 2 – Adding an SSID
then go to Settings, WiFi.
Choose “Create New”, or edit an existing SSID that you’d like to use.
In the Name field, enter the name that you’d like the access points to broadcast.
Under the Advanced section:
Choose Manual to enable the additional features.
Hotspot 2.0 – Select Captive Portal
Client Device Isolation – Tick this
RADIUS MAC Authentication – Tick this
Select the HeyGuest RADIUS profile
Change the MAC Address Format to: AA:BB:CC:DD:EE:FF
Security Protocol: Open
Save your new SSID by pressing the Add WiFi Network button.
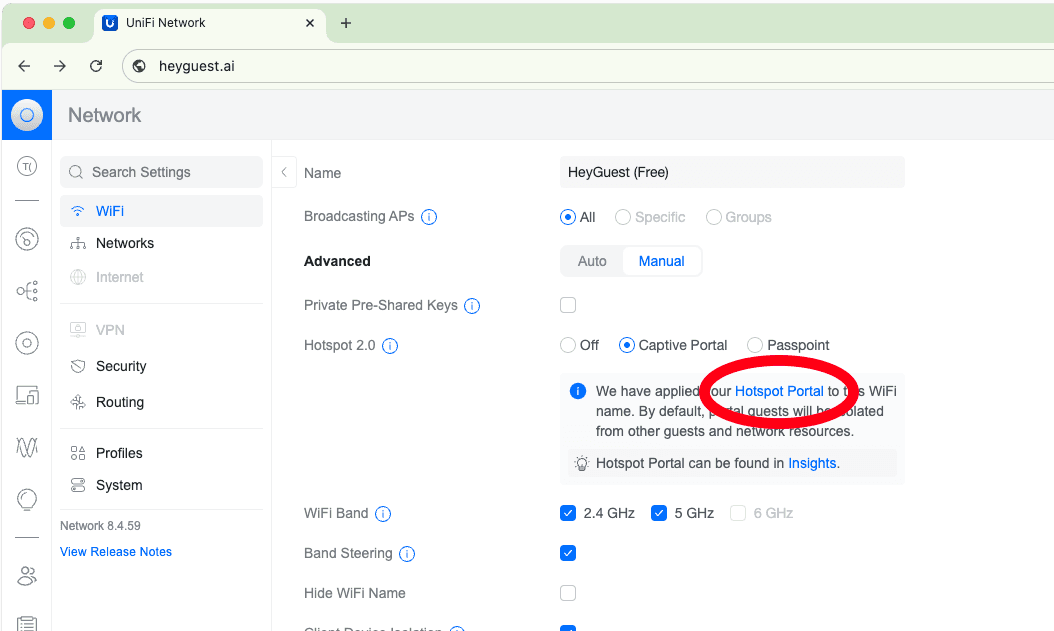
Step 3 – Hotspot Configuration
There are two ways to access the hotspot configuration section of the Unifi controller:
Edit the newly created SSID and click on ‘Hotspot Portal’ within the area that says “We have applied your Hotspot Portal to this WiFi name.’ under the Captive Portal.
Via the Insights link (the lightbulb icon) on the main menu, then by choosing Hotspot from the tab menu at the top of the page, then clicking on the ‘Landing Page’ button.
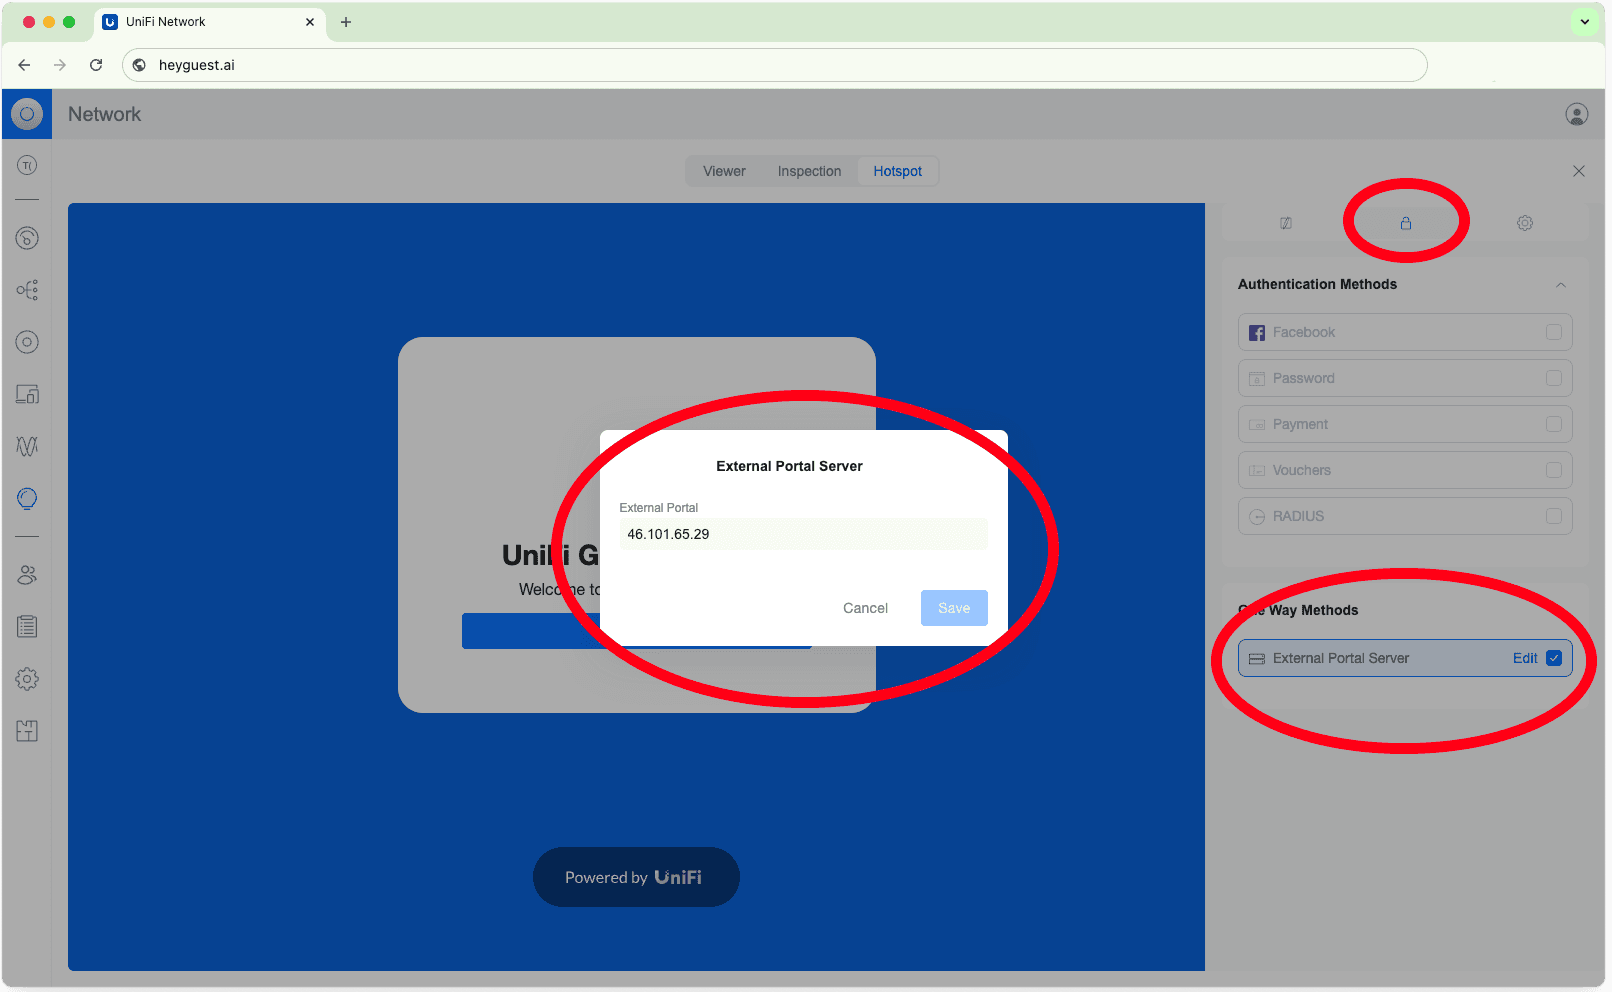
Now you’ve successfully navigated your way into the Hotspot settings, the section to the right has three tabs, choose the middle one with the padlock icon.
Under the One Way Methods section, tick the External Portal Server box and enter the IP address of 46.101.65.29 and click save.
Now you’ve successfully navigated your way into the Hotspot settings, the section to the right has three tabs, choose the middle one with the padlock icon.
Under the One Way Methods section, tick the External Portal Server box and enter the IP address of 46.101.65.29 and click save.
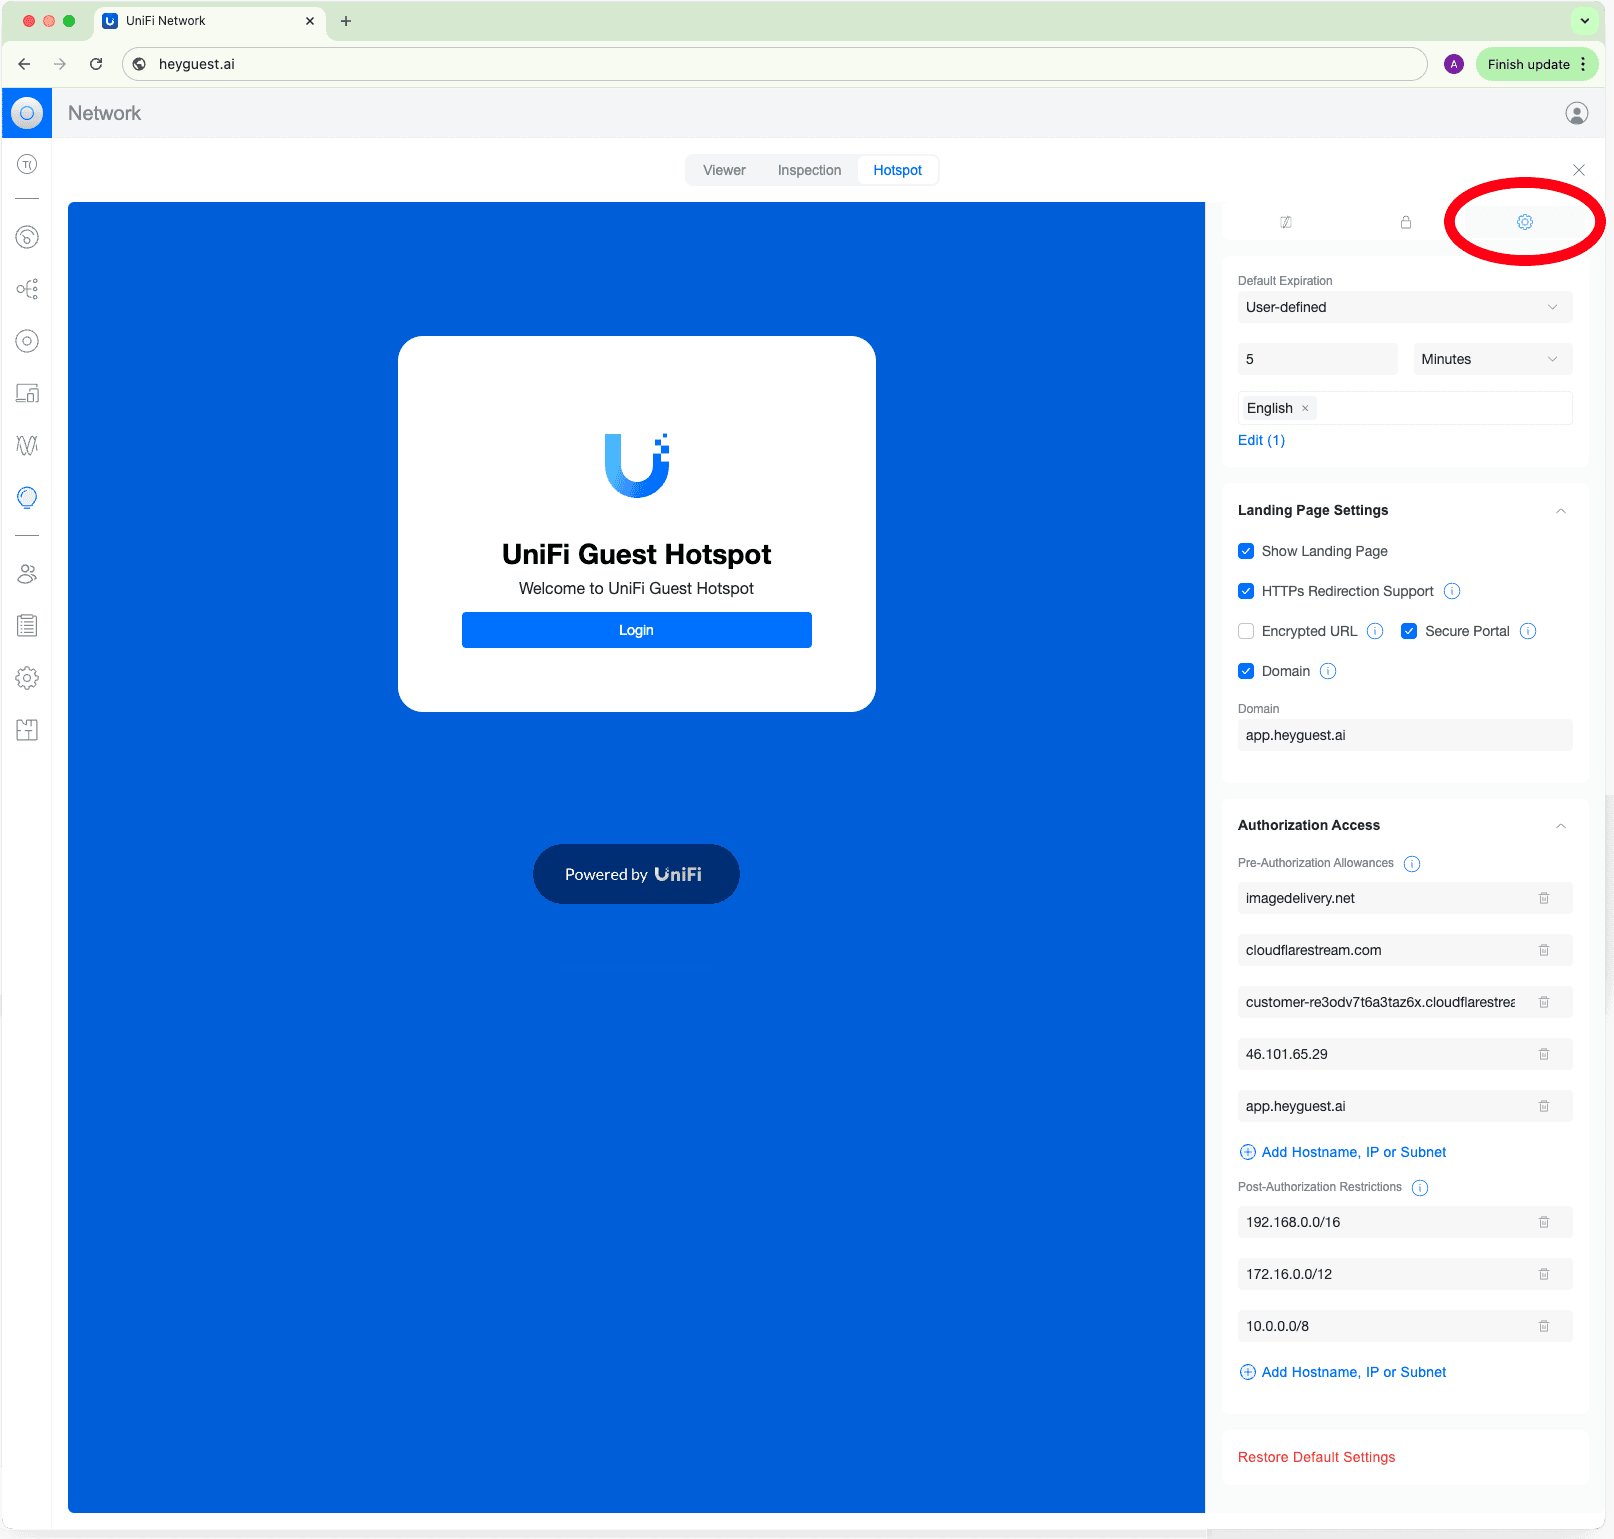
Next, click the Settings icon to the right of the Padlock to open the Landing Page Settings.Default Expiration – User-defined
Set this to 5 minutesLanding Page SettingsShow Landing Page – Tick this
HTTPs Redirection Support – Tick this
Secure Portal – Tick this
Domain – Tick this and enter app.heyguest.aiAuthorization Access
Pre-Authorization Allowances – add in the following:imagedelivery.net
cloudflarestream.com
46.101.65.29
app.heyguest.ai
Click Save
Step 4 – Portal User
In order for our system to communicate with your Unifi controller we need you to create an admin user for our server. You can do this as a single account that has access to all of your Unifi sites (useful if HeyGuest is being deployed at more than one location). To create a user that has access to all sites, choose ‘All Sites’ on the top menu.
To add a user:
Click on Admins on the main menu.
Click the + button on the top right of the window.
Untick Remote Access
Tick Set Admin Password
Use the email address of unifi@heyguest.ai and set the password that’s been provided to you in the HeyGuest dashboard.
Join our Community Forum
Any other questions? Get in touch